In this tutorial we will learn about install apache maven in windows operating system
Maven is a software project management tool like gradle
maintaining by Apache
If you are new to maven then below points will help you to understand maven
- It is one of the easiest way to create a Java project
- Easy to manage the dependencies (external jars)
- Easy to build a jar or war
- The project size will be so less
pom.xml
pom stands for Project Object Model
pom.xml is the heart of a maven project
It is a xml file which will have all dependency and build details for that project
Prerequisites
- Windows Operating System
- Java > 8 Refer https://beginnersbug.com/how-to-install-java-in-windows/
- JAVA_HOME need to set on path variable Refer https://beginnersbug.com/how-to-set-java-home-in-windows/
- Internet download access
Step 1
Download apache maven binary zip version from below URL
http://apachemirror.wuchna.com/maven/maven-3/3.6.3/binaries/apache-maven-3.6.3-bin.zip
Step 2
After downloading zip file.
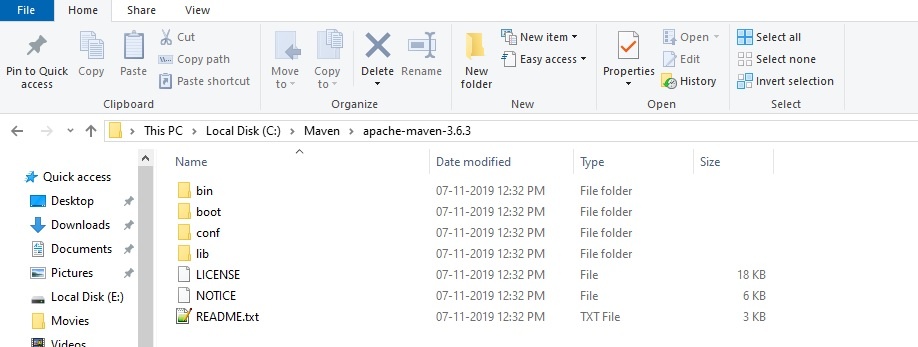
Extract and place in some folder
In this example I am creating Maven folder on C: Directory of my windows Operating system
The folder path is like C:\Maven\apache-maven-3.6.3

That’s it !!
We installed Apache maven in windows. Please follow next tutorial to setup maven home
We can use mvn command only if we have JAVA_HOME and M2_HOME in environment variables
Refer this tutorial to set M2_HOME
https://beginnersbug.com/set-maven-home-in-windows/
if not we will face below exceptions
The JAVA_HOME environment variable is not defined correctly
This environment variable is needed to run this program
NB: JAVA_HOME should point to a JDK not a JRE
'mvn' is not recognized as an internal or external command,
operable program or batch file.Related Articles
Set Maven Home in Windows
Create a Maven Project using command prompt
