In this tutorial, we will learn how to create spring boot application
What is Spring boot
Spring Boot makes it easy to create stand-alone, production-grade application. It internally use Spring framework and have embedded tomcat servers, nor need to deploy war in any servers
Also easy to create,configure&run
What You Will learn
End of this tutorial, you will learn to create a spring boot application
Annotation
@SpringBootApplicationDependency
<parent>
  <groupId>org.springframework.boot</groupId>
  <artifactId>spring-boot-starter-parent</artifactId>
  <version>2.2.6.RELEASE</version>
  <relativePath /> <!-- lookup parent from repository -->
</parent>
Time needed: 30 minutes
Steps
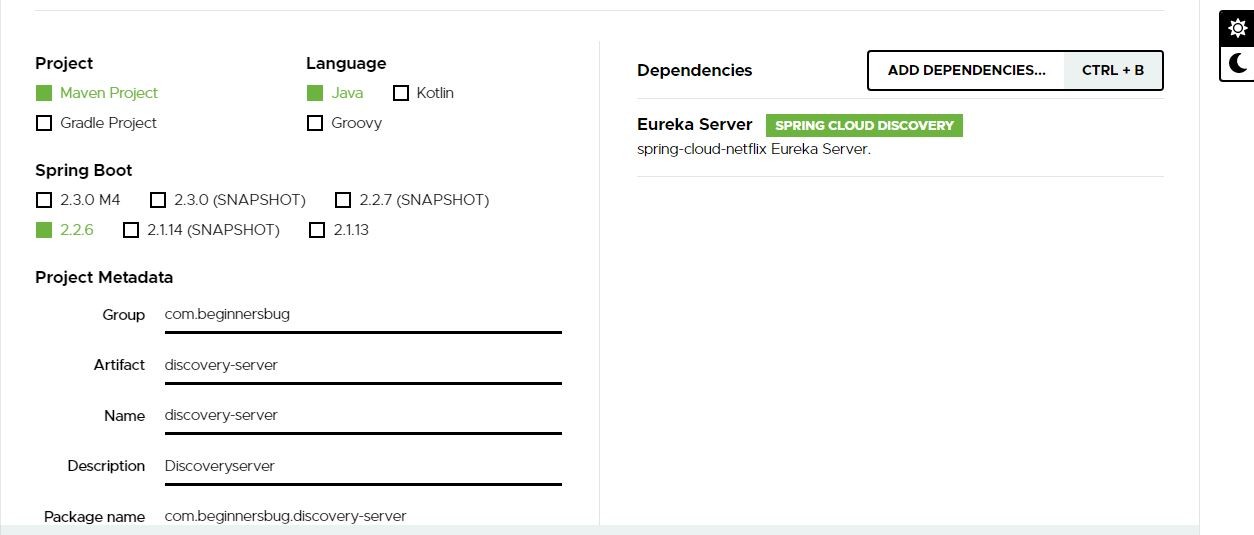
- Navigate to Spring initializr website
Click on this url https://start.spring.io/
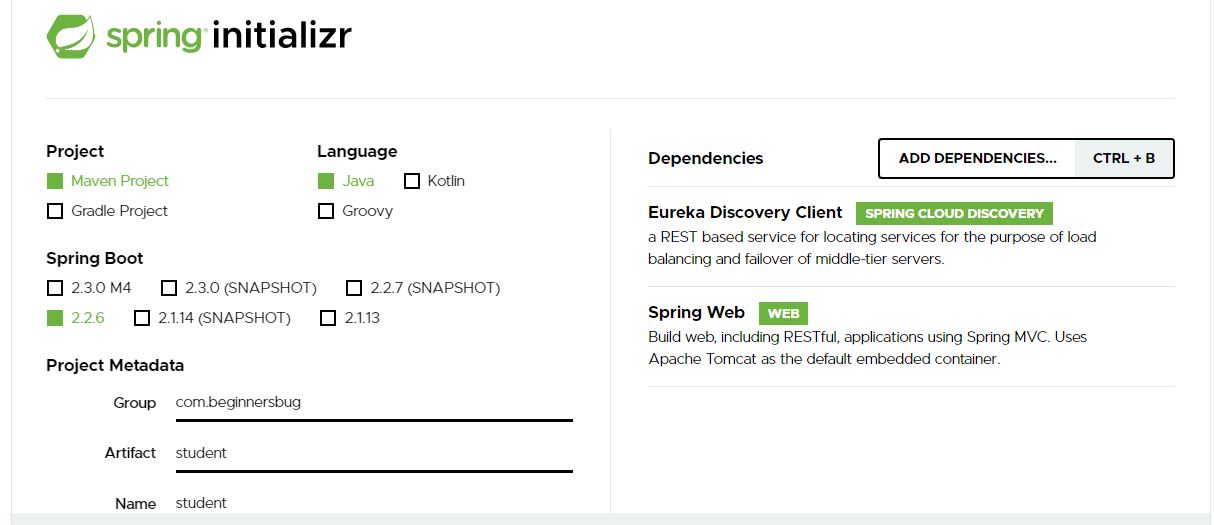
- Choose project as Maven
In this tutorial I am using Maven. You can use gradle or groovy also
- Choose language as Java
Here I am using Java. But we have option for Kotlin & Groovy also
- Spring Boot Version
Please select the stable version, I am using 2.2.6
- Enter Group,artifact,Name & description
Enter the groupid,artifactid&name as you wanted
- Packaging as Jar
Choose Jar, But you have option for war also
- Java Verison
Here I am using java 8
- Add Spring Web as dependency
In case you going you want to expose rest service, Click on the add dependency and select spring web.
- Click on the Genreate
Once you filled all these details click on the Generate Button.
It will download .rar format - Extract the downloaded file
Once your download complete, Extract the downloaded .rar file
- Import in Eclipse
After Extracting, Import the project in eclipse
- Navigate to Main Class
Navigate to Main class which will be under src/main/java
and Make sure the class have @SpringBootApplication annotation - Run
Right click the class and choose the Run As –> Java Application
- Verify logs
Once your application starts you can see below logs in console
Tomcat started on port(s): 8080 (http) with context path ''
Updating port to 8080
Started StudentApplication in 22.834 seconds (JVM running for 24.503)
Related Articles
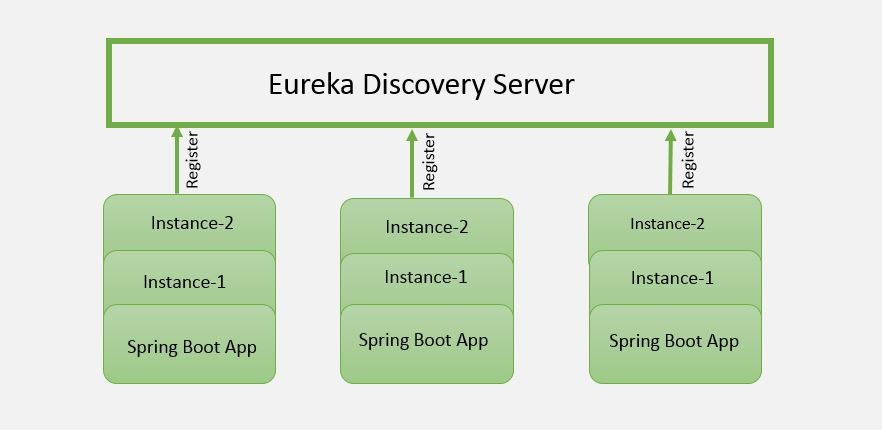
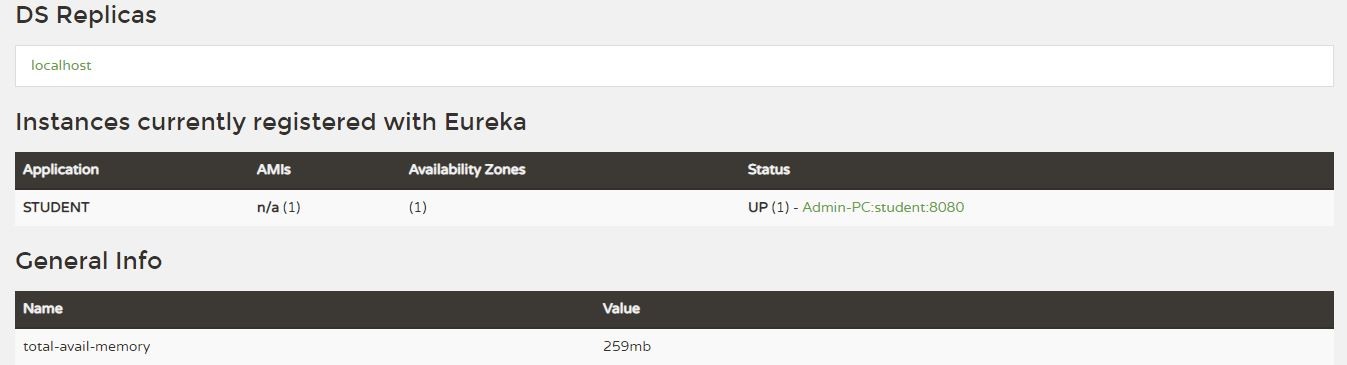
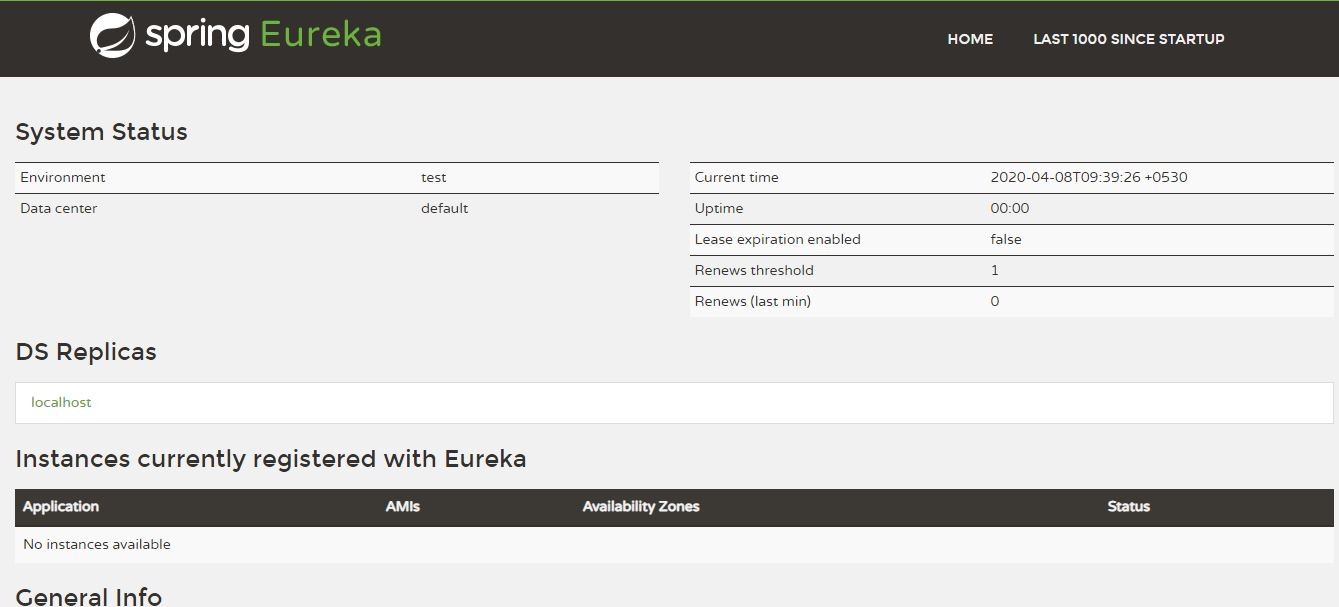
create netflix eureka discovery server using spring boot
register spring boot micro-services to eureka discovery