In this post, we will learn about the bubble sort algorithm. The bubble sort algorithm is one of the important sorting algorithms
It will compare two adjacent elements in an array and swap the right value to the left if it is lesser than left
Bubble Sort
Time Complexity: O(n^2)
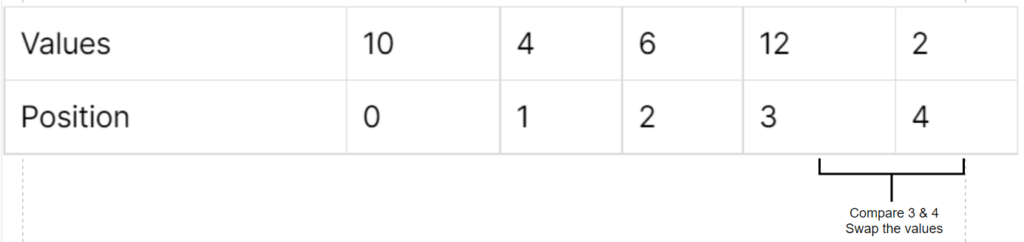
Values
10
12
4
6
2
Position
0
1
2
3
4
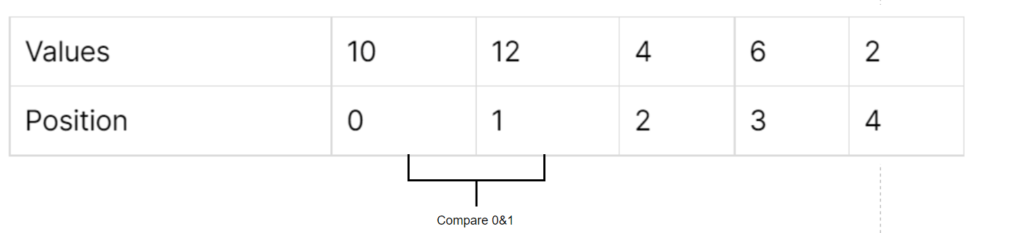
Input Array
Step 1
Iterate the given array using for loop
Step 2
Add one more iteration within the for loop again
Step 3
compare the first element with second element
Step 4
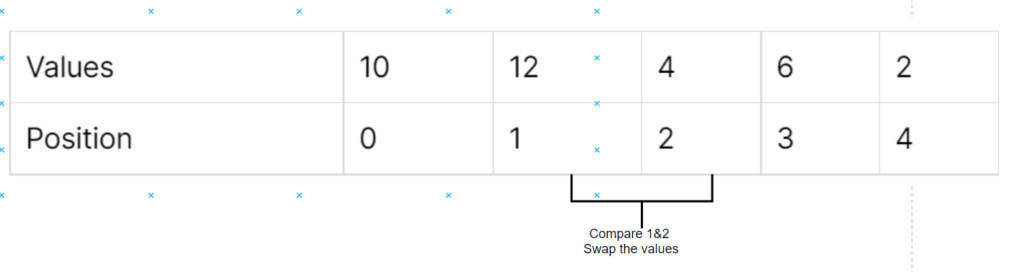
If first element greater than second element swap the two elements
Step 5
Compare the second element with third element
Step 6
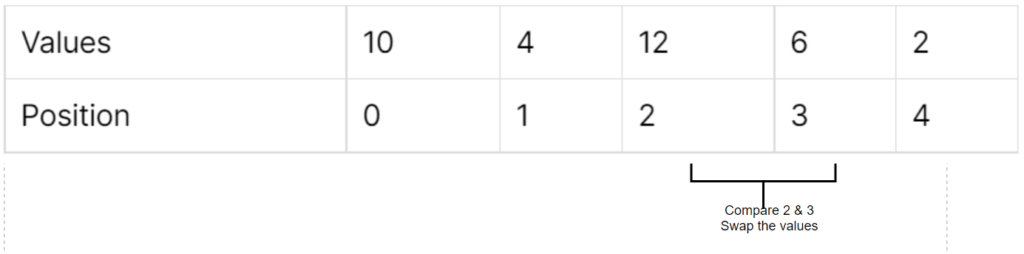
If Second element is greater than third element, then swap the two elements
Step 7
Continue until nth element
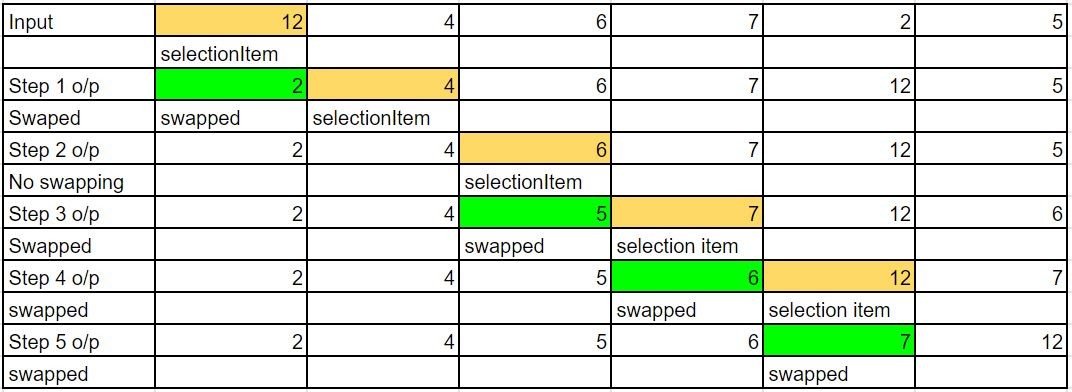
Step 1
Step2Step 3Step 4Result of the first iteration
Java Implementation
public class BubbleSort {

	private void sortArray(int arr[]) {
		for (int i = 0; i < arr.length; i++) {
			boolean isSwap = false;
			for (int j = 0; j < arr.length - i - 1; j++) {
				if (arr[j] > arr[j + 1]) {
					int temp = arr[j + 1];
					arr[j + 1] = arr[j];
					arr[j] = temp;
					isSwap = true;
				}
			}
			if (!isSwap) {
				break;
			}
		}
	}

	public static void main(String[] args) {
		int arr[] = { 10, 12, 4, 6, 2 };
		System.out.println("Array Before sorting");
		for (int i = 0; i < arr.length; i++) {
			System.out.print(arr[i] + "  ");
		}
		BubbleSort bubbleSort = new BubbleSort();
		bubbleSort.sortArray(arr);

		System.out.println("\nArray After Sorting");
		for (int i = 0; i < arr.length; i++) {
			System.out.print(arr[i] + "  ");
		}

	}

}
Output
Array Before sorting
10  12  4  6  2
Array After Sorting
2  4  6  10  12
Binary search algorithm is one of the fastest way to identify the element from an sorted array. It is also the commonly asked data structure interview questions.
It works based on divide and conquer mechanism. It will divide the given array into 2 parts and discard the one part. So it will works faster for a big array compared to linear search.
Time complexity of Binary Search is O(logn)
Below is the give array structure
With the above given array we have to find the position of 9, Using linear search we can find easily, But the time complexity will be O(N)
Below is java code snippet to find the position using Binary Search
public class BinarySearchExample {

	private int binarySearch(int[] array, int target) {
		int leftIndex = 0;
		int rightIndex = array.length - 1;
		while (leftIndex <= rightIndex) {
			// find the middle Index
			int middleIndex = (leftIndex + rightIndex) / 2;
			if (array[middleIndex] == target) {
				return middleIndex;
			}
			if (target > array[middleIndex]) {
				// ignoring the left side of array
				leftIndex = middleIndex + 1;
			} else {
				// ignoring the right side of array
				rightIndex = middleIndex - 1;
			}
		}
		return -1;
	}

	public static void main(String[] args) {
		int[] i = { 2, 3, 5, 6, 7, 9,10 };
		int targetNumber = 9;
		BinarySearchExample object = new BinarySearchExample();
		int output = object.binarySearch(i, targetNumber);
		System.out.println(output);
	}

}
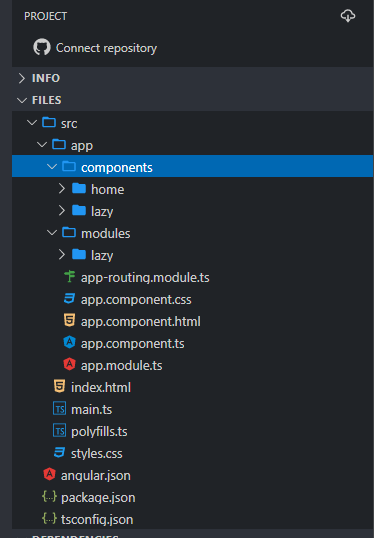
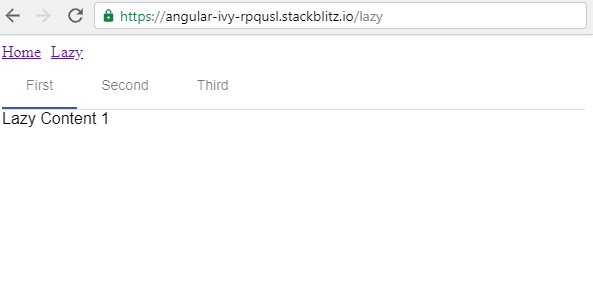
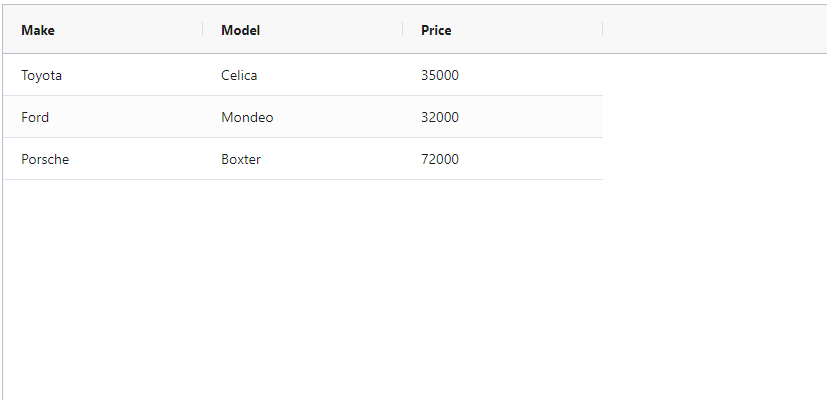
In this post, we will see ag grid angular examples. ag grid is one of the most commonly used grid in modern web applications. It is easy to integrate with java script, angular. react ,vue.js.
In this post, we will learn about create dataframe in python using pandas. There are multiple ways to create dataframe in python
DataFrame
Dataframe is one of the data types in python as like string, int. It will look like a table.
It consists of rows and columns. We can say that it is a two-dimensional array.
Here we are using pandas to create the data frame. Pandas is a fast and powerful open-source package. For More details refer the doc below https://pandas.pydata.org/
Installing Pandas Libraries using pip
pip install pandas
Installing Pandas libraries using conda
conda install pandas
In order to use pandas, we should install a pandas package on our machine. Open the terminal/Command prompt and run any one of the above commands Once you installed we need to import using the import command below
import pandas as pd
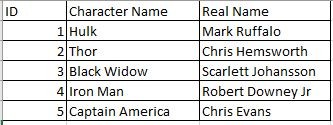
Here I am going to create a data frame with avengers details as like below image
Below are the multiple ways to create dataframe in python using pandas.
 Created Dataframe using List
    ID   Character Name           Real Name
 0   1             Hulk        Mark Ruffalo
 1   2             Thor     Chris Hemsworth
 2   3      Black Widow  Scarlett Johansson
 3   4         Iron Man    Robert Downey Jr
 4   5  Captain America         Chris Evans
In the above example, we have created a data frame using the list.
Created Dataframe using dict
    ID   Character Name           Real Name
 0   1             Hulk        Mark Ruffalo
 1   2             Thor     Chris Hemsworth
 2   3      Black Widow  Scarlett Johansson
 3   4         Iron Man    Robert Downey Jr
 4   5  Captain America         Chris Evans
Here we are created a data frame using the dictionary. Printed the output.
3. Create data frame from csv file
In the below code, we are importing a CSV file as a data frame with the help of pandas library
import pandas as pd

df_avenger_data_csv = pd.read_csv("D://avenger_details.csv")
print("Created Dataframe using csv file")
print(df_avenger_data_csv)
print("\n")
Output
Created Dataframe using csv file
    ID   Character Name           Real Name
 0   1             Hulk        Mark Ruffalo
 1   2             Thor     Chris Hemsworth
 2   3      Black Widow  Scarlett Johansson
 3   4         Iron Man    Robert Downey Jr
 4   5  Captain America         Chris Evans
4. Load Mysql table as dataframe using pandas
To load the MySQL table data as a data frame we need a MySQL connector library. you can install using the below command
pip install mysql-connector-python
Once you installed the MySQL connector in your system. you need to create the MySQL connection object and need to pass the connection object and query to the pandas as below
import pandas as pd
import mysql.connector

mysql_connection = mysql.connector.connect(host="localhost", user="root", password="password", database="avengers")
df = pd.read_sql("select * from avengersdetails", mysql_connection)
print("Created Dataframe from mysql table")
print(df)
mysql_connection.close()
Output
Created Dataframe from mysql table
    ID    CharacterName            RealName
 0   1             Hulk        Mark Ruffalo
 1   2             Thor     Chris Hemsworth
 2   3      Black Widow  Scarlett Johansson
 3   4         Iron Man    Robert Downey Jr
 4   5  Captain America         Chris Evans
5. Load Mongodb collection as dataframe
To load the MongoDB collection data as a data frame we need pymongo library. you can install using the below command
pip install pymongo
Once you installed the pymongo in your system. you need to create the MongoDB connection object. After that, you need to convert MongoDB to pandas data frame
Created Dataframe from mongodb collections
                         _id ID   Character Name           Real Name
 0  5fd0e603549a851a24a48c36  1             Hulk        Mark Ruffalo
 1  5fd0e603549a851a24a48c37  2             Thor     Chris Hemsworth
 2  5fd0e603549a851a24a48c38  3      Black Widow  Scarlett Johansson
 3  5fd0e603549a851a24a48c39  4         Iron Man    Robert Downey Jr
 4  5fd0e603549a851a24a48c3a  5  Captain America         Chris Evans